It's a tradition that goes back generations. Spending time together on a crisp Fall weekend. Sharing a special technique and recipe.
Reminiscing about old times and remembering loved ones.
Our family has made apple butter in an old copper kettle together as a family since the 1950's. This weekend, we made it again.
It started several weeks ago, across the Mississippi River, to pick up five bushels of Jonathan apples.
Hagen's Orchard had a good variety of apples for sale. Our Jonathan are the red and green in the lower part of the picture.
I went with a couple who lived in my old neighborhood. They also make apple butter. All of our apples were loaded into their truck for the trip home.
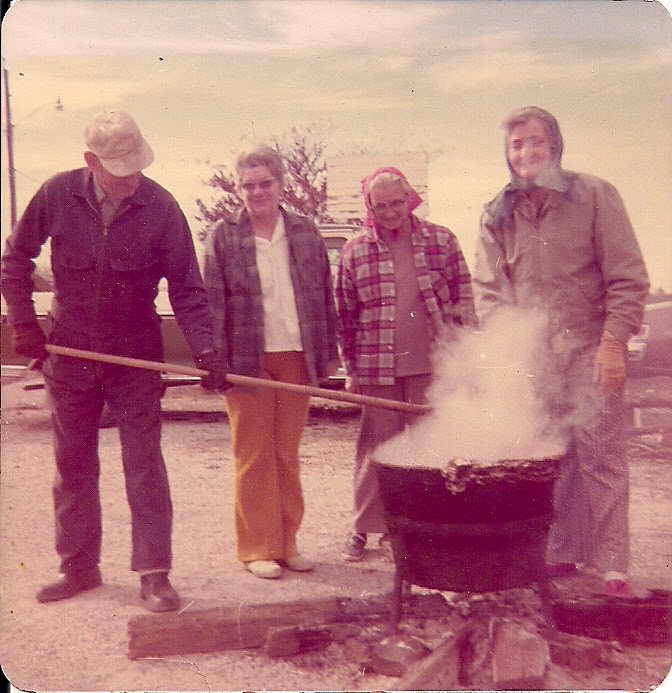
For many years, our apple butter making took place at our folk's home. My mother's uncle purchased the first copper kettle at the urging of his wife who saw it advertised in a local paper. According to family lore, he wasn't keen on the idea and, upon entering the store, told the proprietor, "I hope you don't have what I came in here to buy." Fortunately for us, he made the purchase and the rest is history! Since this couple didn't have children, the responsibility of apple butter making turned to their nieces. It started at Mom and Dad's house and continued there for almost 50 years. Now the tradition continues at our home. Here's a little photographic history.
We've made in the bright sunshine.
We've made in the rain.
These are the original siblings, Kee, Ethel, Sallie Mae and Eleanor.
Their niece, Marion, was also always on hand.
Later, we helped. That's me in the middle, circa 1986
and more cousins, Wilson, Diane, Loyd and Nancy as well as Favorite Son,
Andy in 2001.
Such great memories!!
Now back to the present.
It takes a bit of preparation for the weekend to run smoothly.
Supplies are gathered.
Various pans and buckets are needed for the peeling and coring of the apples.
Jars are washed and stored, cleaning supplies were readied, lunch fixings prepared and the ingredients are purchased.
(Breakfast Casserole for the early morning and Soup and Chili for lunch.)
The evening before we cook, many of our family members get together to peel and core the apples. This takes up to three hours, depending how many people come to help. This year we had ten. Here are some of those who were on hand.
Wonderful Hubby is our main peeler and uses the old step stool
Mom had for years.
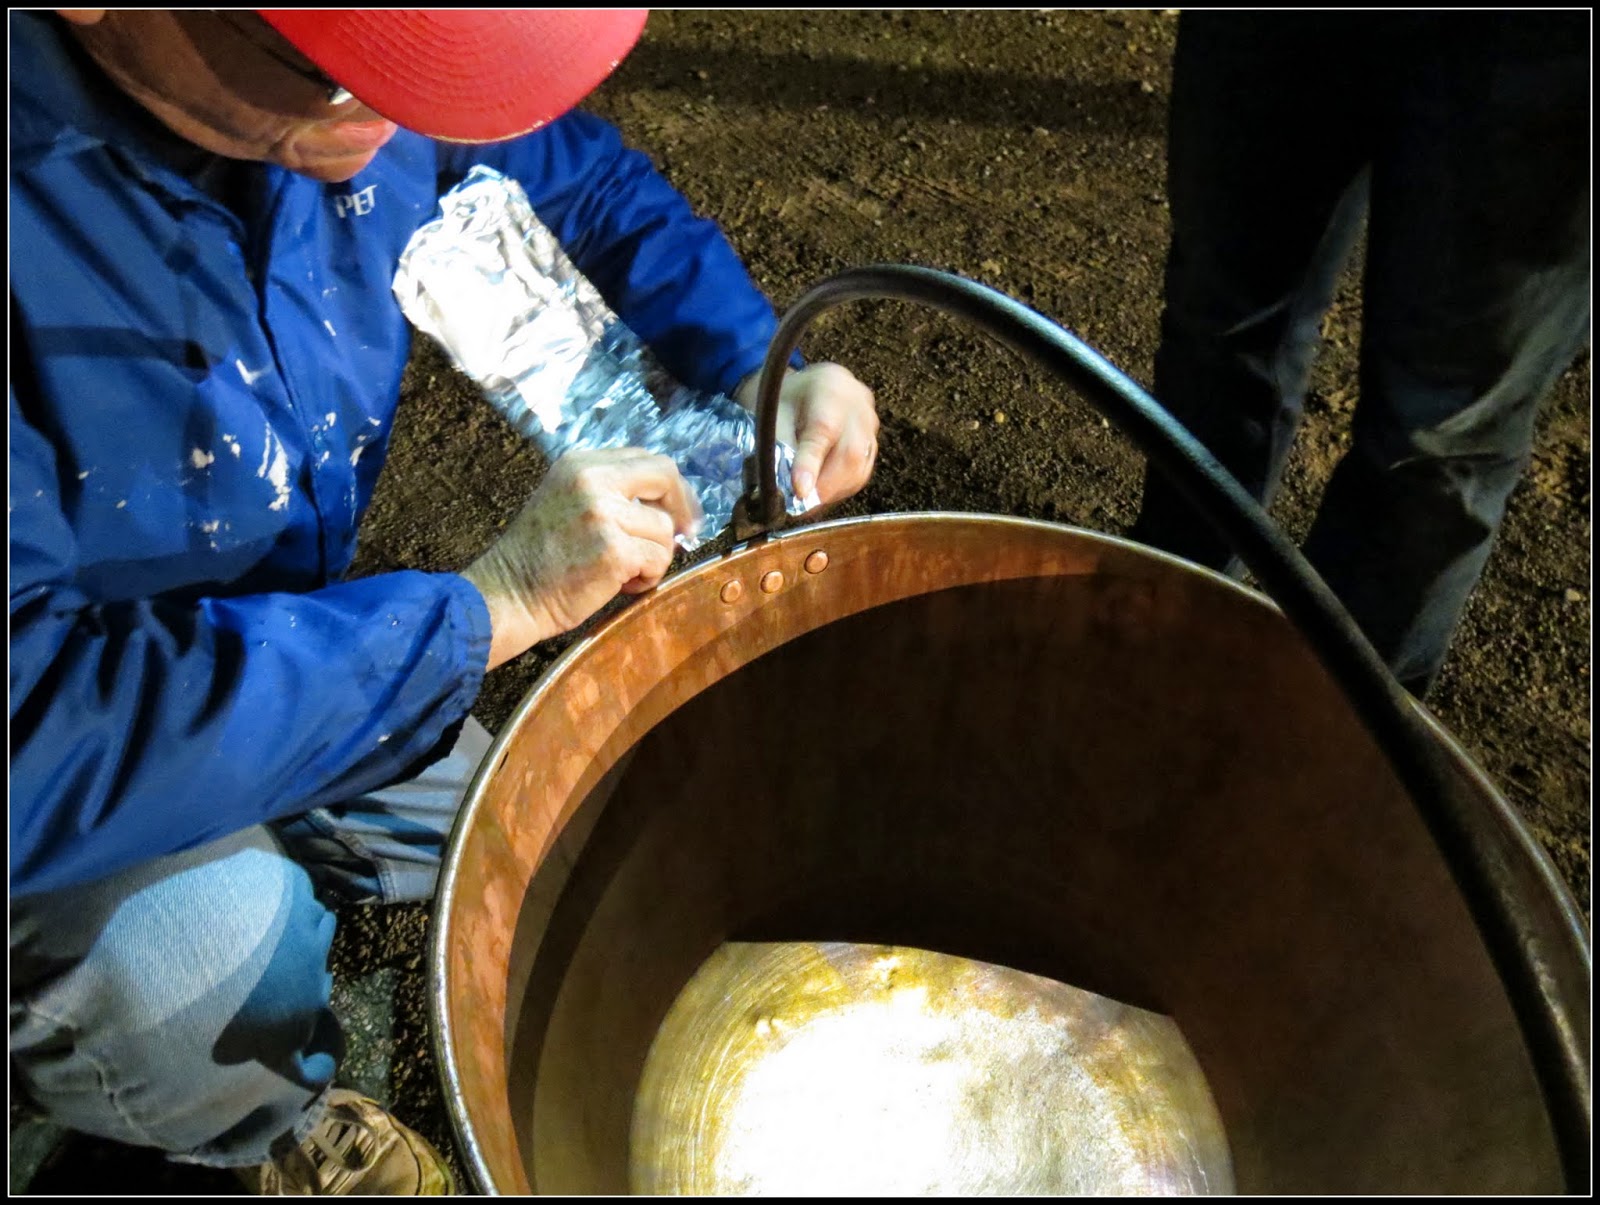
Early the next morning (about 5:30!) the kettle is washed and the fire is started. We cover the bail with foil to help with clean-up. It's then placed on a level spot so the contents cooks evenly.
We're serious about this leveling part! Sorry about the action shot.
That's my brother!
We're cooking by 6:15. Juice, made from some of the peelings, is added first to the kettle. Next come some apples that were cooked all night in several crockpots.
We stir this with a long-handled paddle with holes drilled through to make the apple butter smooth. Our dad made this one as well as a replacement. (You just never know when you might need another one!)
More apples, both raw and cooked, are added to the kettle until all the apples that were cut up the night before have been added. This takes several hours. To these apples, we add 24 pounds of sugar, 1/2 cup of ground cinnamon and 1/2 teaspoons of ground cloves. (I know, Years ago our aunts had a hard time agreeing if cloves should even be added. After MUCH discussion, it was decided this small amount was acceptable! That's what FAMILY is all about - COMPROMISE!)
The rest of the day, we take turns stirring and tending the fire. It's important to continue stirring to avoid scorching. We use the "M" and "W" technique by moving the paddle back and forth tracing these letters on the bottom of the kettle. We also need to keep the fire constant. Too hot and the butter pops out of the kettle, not hot enough, the butter doesn't cook quickly enough.
And then there's the visiting! It's so nice to be together to
catch up with each other.
All totaled, Saturday, we had about 25 extended family members
helping and visiting.
As you can see only one person can stir at a time. That person has a LOT of support from everyone else!
Cousins!!
Finally, we have apple butter!! Doesn't that just look delicious?!!
This is the time where everyone who has been relaxing jumps into action. Someone continues to stir while the fire beneath the kettle is removed, jars are brought outside and ready to be filled. An assembly line is formed to pour the HOT apple butter into each of the jars.
Once a box of jars is filled, someone carries them inside and more jars are brought out.
This year we had 100 pints!!!!
Oh, my! The ultimate Fall delicacy!!!!!!!!!
The next day, once the apple butter cools, the jars are cleaned and paraffin wax is used to seal them. Precious Daughter helped with the job this year.
What a lovely day for making apple butter AND new memories!
Thanks for joining us!
Linking to these great parties:
Amaze Me Monday
Metamorphosis Monday
Had to include one more!
Dad never did much stirring but when he did, he always wanted his picture taken.
Here you go, Daddy!


